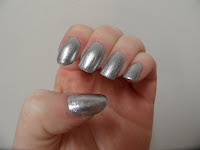
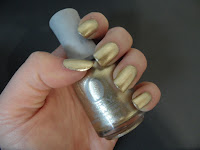
So, even though it's the last thing I should have done at this point in time, I went slightly crazy over the countless online deals on nail polish. After trying to decide between the main retailers(8ty8beauty, transdesign, etc), I settled on Victoria's Nail Supply, for reasons I don't even remember right now. However I will say they were quick, cheap, and I'm happy.
Onto the photos!
The first is of all of them together. And then I grouped em into smaller photos to properly label them(and to even remember what I got today.) For the record, moving from photos and polish left to right, they are as follows: Color Club Hot Like Lava, CG Adore, CG Flyin' High, CG Paper Chasing, CG Dance Baby, CG Concrete Catwalk, CG Something Sweet, CG Kinetic Candy, Color Club Beyond the Mistletoe, Color Club Sugarplum Fairy, CG Grape Pop, CG Devotion, CG Refresh-mint, CG Calypso Blue, and CG Turned Up Turquoise.
I couldn't quite decide what to do first, so decided to pick at random something I've pinned recently, and came up with a triple pink striped mani. Original inspiration found here
Here's my stage by stage process, of course with a coat of SV in between, and then taped off for the new layers. Please forgive my spray paint and adhesive covered hands ps. The light pink is CG Something Sweet, the barbie pink is CG Dance Baby, and the hot pink is CC Hot Like Lava.
After finishing, I went to the original post to compare shades used, and saw the "We wear pink on Wednesdays tag." I was so excited that this was the first mani I could use that for, and ironically saw that it was her first one too!
Small world.
LOTS of new designs to come in the near future, methinks.
-T
Thursday, April 19, 2012
Sunday, April 15, 2012
No more red, white, and blue...
...nails for awhile, because hockey season is over! My team's colors are blue/red and a little white, in case you were wondering why I have so many 4th of july designs...
With that being said, that brings me to the first design I have to show you.
Started off with pure white nails, China Glaze White on White style.
I like this white because it's not too chalky. Some whites do just look pure white-out on me.
Unfortunately I forgot to take a pic of the red-only, but essentially all I did was tape off all but the top angled half of the nail, and then painted it red with China Glaze's Red Pearl. I REALLY am not a fan of red ANYTHING, but it's not a bad polish. Has a bit of a shine to it.
After letting that and of course a coat of SV dry, I taped off all but the opposite corner, and then painted over with China Glaze(of course)'s Frostbite. Now Frostbite is a unique blue. Not TOO dark, and a very nice frosty shimmer.
I don't know why, but the blue was an absolute pain in the ass to do. The mani itself couldn't have taken me more than 2 minutes per nail, and that's including base, white, rip tape, place tape, paint, sv, repeat. But the blue just would not cooperate. Even at the end you could still see the red lines through, but as I was going to be in a dark hockey arena all night I called it good.
Here's a couple more shots of how it turned out.
I also thought I'd mention the routine products I use. I don't swear by it, but the base coat I've been using consistently is China Glaze's Strong Adhesion Base Coat. I don't get much staining, but occasionally there is a little. Sally Hansen makes a couple good base coats as well. I don't recommend Seche Vite's, though, unfortunately. As for top coat, I almost always use SV, if I'm doing any top coat.
Moving on... the design I did to inspire the above one, I'm not particularly fond of, because I kind of grabbed the wrong color in the dark...oops. I used the identical method as listed above, but I only did one corner. It was meant to be black with blue glitter, and I didn't realize until taking photos that I grabbed a teal glitter.
Anywho. Black is CG Liquid Leather. Teal is Finger Paint's Art you Wondering. I took a closeup of the bottle to show how pretty the glitter is. The blue I was going to use is EVEN PRETTIER, but I'll save that for another day!
The last mani I have to show you today is another half moon one. I definitely did steal the color combo off of Pinterest, so here is the link to the original post. I wish I had used the OPI color :/.
I started off with a base coat of LA Colors silver glitter...I know it HAD a name, but it's nowhere on the bottle. I've honestly bought about 5 more silver glitters/foils trying to find a PURE foil, but this is by far the best I can find, and it cost a whopping $1 at Dollar Tree. I did mess up one nail a bit :(.
I then used the same method mentioned a few blogs back, but took a pic this time! And did an overcoat of CG For Audrey.
I really wish I could say I like how the colors went together, but I'm not a huge fan. However, it is very spring appropriate, so it's stayed for now. Here's the final result, as well as a couple more pics of the silver to show how well it turned out on it's own. And a super cheap ring I got from Claires, which kind of tied it all together nicely, I think.
-T
My favorite things
Haven't really put much personal stuff on this blog yet, so I thought I'd post a few nice photos to get to know me!
We've all seen the "thinspiration" pics, before/after pics that seem so fake, and I have lost a great deal of weight, so decided to do one myself finally. I dunno if it qualifies for thinspiration, but I'm sure proud of it! Weight loss never really clicks until you see something like this, I don't think.
The first photo is dated June of '07, but I was that weight, or very close to it until about Feb of last year. I've been my current weight for a good 6 months, also, but I don't have any better full body shots. This one I took today in a dressing room and was a similar enough pose to use.
And for ANYONE curious, I am 5'4(and a half), shirt size currently a medium(although some fitted shirts I do still have to get a large, due to my chest), and pant size small or juniors 5, skirt size juniors 3 or small. Prior to this I was a shirt size large or extra large, and pants size juniors 11 or 13, large/extra large.
I'd love to say it's the result of months or years of hard effort, dieting, and exercising, but really 90% of it came from a diet pill. Believe it or not, one actually works(for me, anyway.) I PROMISE this is not a plug, but I do definitely recommend anyone who is looking for a supplement to try Oxyelite Pro. You can find it at GNC, or on Amazon, etc. I DID try months(years) of exercise, diet, Weight Watchers, etc, and I'd lose at most 20lbs. Which was still a big deal, but one bad weekend of eating and almost half would come back.
Unfortunately for me, the weight is gone but I'm still left with some flab here and there, so I'm TRYING to motivate myself to do some real exercise and do a real diet to get the remaining flab off. Ideally, I'd like to turn it all into muscle, resulting in at maximum 5-10 more lbs lost.
Anyway. The real point of this post was to show off my adorable animals, so without further ado here are my favorite things in life. Widget(the white one), Phoenix(the little grey girl), and Allsparq(the fluffy one.)
New crafty things
I've been putting off making new blog posts, because it's soo frustrating to add photos on here for me. So here's a few new things I've done/been working on.
First up is my favorite, a necklace made from gears. Very steampunk, which I like. I saw this necklace on Etsy, made from a bazillion gears, and saw a 12 pack of similar ones at Hobby Lobby(also at Michaels) for $7 and knew I had to make one myself. I would LOVE to link up to the gears, but I can't find them on either of their sites!
I honestly had never made any jewelry before this, aside from your VERY simple beaded things, so it was entirely new to clasp and unclasp the rings, put together a claw clasp, cut the chain, etc. But I think it turned out fabulous. This one in particular is the one I made for my SIL, who gave me my very first Etsy sale(thanks!)
Here's a few more photos, including me wearing the one I made for myself. It's very easy to put them together, epoxy or superglue the gears together, make the necklace, but if you don't feel like doing it yourself, here's a link to my Etsy listing for one. Only $15 shipped! :)
Next up, I finished my bathroom canvas pop-art. I don't really know what else to call it, as it has a very Warhol feel, minus being solid colored. My new shower curtain has elephants and hearts in orange/blue/brown/light green colors, so the butterfly one just didn't quite fit.
This is an up-close pic of it, and then here's another one of it against a few of the accent towels, to give you a better idea of the color scheme I was working with.
The sock monkey helps the colors pop, don't ya think? It was a very sweet gift from the bf when he was living in Texas and me in Iowa, he sent it in a package of Christmas gifts, and sprayed it with his cologne. It still faintly smells like it, too. :)
I don't think I've posted this at all yet, this I actually made a long while ago, when first deciding the new bathroom scheme. The wall had been empty for some time, and I had an empty poster frame to use.
I really wanted to cut the letters out of scrapbook paper using stencils, but I couldn't decide what size stencils I like, or what paper to use. So instead I did a google search for stencils, and copied different letters, then filled them in with various backgrounds from paint shop's library, or random background sites. Printed em out on cardstock, cut em, and glued em on!
The quote is actually a lyric from a song by The Cure, "The Promise." I plan on getting it tattooed somewhere, but haven't found what I want to tie in with it yet. As you can see, I haven't quite finished the decor as there's still Hello Kitty framed pics on the other wall!
As for upcoming projects, there's a few things I'm wanting to work on. I plan on posting some photography onto my Etsy page. I just got a nice big vase from a garage sale for a whole quarter that I'd like to turn into a terrarium. Also got a (badly painted) 2 level bird house, that's more of a micro book case, that I'll at least paint, but I have no plans with from there. We shall see!
-T
Tuesday, April 10, 2012
Disco ball nails
I was gonna wait to post another nail update after I had a couple more designs underhand, but, I've been looking for a good Deborah Lippmann's Happy Birthday replica, and thought others might be, too, so wanted to share asap!
This is Happy Birthday, by Deborah Lippmann. It retails for a whopping $18, which I just can't justify spending on one polish(in fact, with last month's Sallys sale, I got 6 China Glaze's at that price!) I've become sort of a China Glaze only snob lately, but saw a very cheap seemingly good replica at Claires a couple weeks ago and picked it up.
This is Bedazzled. It cost a whole $4.50, and got another cute Deborah Lippmann replica for half off with it.
I did a single coat of it when I got it, but didn't like it so kind of tossed it aside. Then when looking up pics of Happy Birthday, I saw it layered over black so decided to try it, and I absolutely love it! The boyfriend calls it disco ball nails, which I can't disagree with!
Did a couple coats of China Glaze's Liquid Leather, and sealed with a coat of Seche Vite first.
I've tried sooo many black polishes, and this one is amazing.
Then did a couple pretty thick coats of Bedazzled, until I was satisfied with the coverage. I haaate seeing open spots, and usually these thick glitters leave me annoyed, but this was super easy to cover up. Instead of doing a top coat of Seche Vite, I used Konad's top coat. It works well for the thick glitters in my opinion, since it's so thick and won't smudge a thing.
Final nails(shot in a couple different modes to accurately show the glitter):
Hope this helps anyone looking for a good replica. Enjoy!
-T
Monday, April 9, 2012
Two recent manis
With the first one-photo-only set of mani's out of the way, I figured I could post two I did recently that I actually got good photos of!
This is actually my current mani. I got China Glaze's Lighthouse a few weeks ago, and while I absolutely loved it right off the bat, it was so ungodly sheer that it could not be worn alone. I had the bright idea to wear it over another yellow, but my only other yellows were also too sheer. Even over white it seemed to show every little imperfection.
Then the other day I stumbled upon some remaining polishes from the Electropop collection at one of the Sallys in town and grabbed Sunshine Pop. That worn alone is just amazing. Two coats for full coverage. And one very thin coat of Lighthouse later, I'm in absolute love! The photos do capture some of the shimmer, but there's so much of it going on it's as if the top coat is frosted.
The second is navy blue with gold half moons.
To achieve this look, first I painted all nails in gold, using Luxe by Orly, as seen above. Then using binder label stickers, I laid a circle on each nail, and painted over with my navy blue, which was Up All Night by China Glaze. The gold went on great, and looks good even on it's own. The blue is more of a DEEP blue, so unless in light it can end up looking black. The original tutorial I used was actually found on pinterest using the exact same colors. Here is that chart, for reference:
Hope you enjoyed. Many more to come!
-T
Recent crafty work
Although I don't have a whole lot of "old" crafts to upload on here, like I did nail art, I do have a few things I've completed recently. I'll try to reference back to their originating point and describe in detail best I can how to do em.
First up is my set of purple dino jars. The idea halfway came from an Etsy page, and then my own creative mind. I don't have this set on my Etsy page yet, but I do have a similar pink set on there now, if you like it but don't feel like making it :).
The concept is very simple, in theory. Glass or plastic jar, take off the lid, glue plastic/vinyl figure to it, then paint. The paint is quite tricky to get to stick to these dinos, though, and the lids were a NIGHTMARE. It must just be the material on these particular ones, as the ones on the plastic set of jars used for the previously mentioned pink ones were super easy.
Here's a closeup of the pterodactyl and some of the other 2.
The next project I worked on was again, very simple in theory, but I think turned out fantastic.
Literally, the only materials used were a blank canvas, scrapbook paper, a punch, and mod podge.
I needed some new wall art, as I just redid my bathroom in elephants, and all my framed Hello Kitty prints looked a bit odd. This turned out perfectly, and matched great. Although it is a bit too small for the area I chose to hang it up in, so I'm going to end up posting this on Etsy and re-doing the project. I'm planning on doing the identical concept, and probably very similar paper, but on a 16x20 canvas with heart shapes, to match the shower curtain a little better.
The original idea came from this blog, I was drawn to it from the butterflies punched out of paint chips, then saw the "3d" butterflies on canvas out of scrapbook paper, and combined the two.
The most current project I'm working on is doing crayon art, as seen here. My first attempt did not go so great, I thought the black background would make it stand out, turns out it just made it look like nothing. The furthest I've gotten in my next attempt is just gluing down the heart-shape and breaking the crayons, as seen in the first photo.
Here's a photo of what I'm hoping my project will come out
looking anything like:
And, last but not least, after seeing dozens of beautiful homemade apothecary jars, I decided to try my hand at it. So far I've just made a cosmetic brush holder, but I think it turned out great. This project cost a whole $3. Got the base - a candle stick holder, the jar - a candle holder, and the stones all from Dollar Tree, and then glued the jar onto the base. I apologize for the messy bathroom, but here's how that turned out.
Anyway, like I said, many more to come. I hope to add actual jars, do a better job at the crayon art, and I'll post pics of the updated canvas pop art, and some photos of the process. Any questions, feel free to ask!
-T
First up is my set of purple dino jars. The idea halfway came from an Etsy page, and then my own creative mind. I don't have this set on my Etsy page yet, but I do have a similar pink set on there now, if you like it but don't feel like making it :).
The concept is very simple, in theory. Glass or plastic jar, take off the lid, glue plastic/vinyl figure to it, then paint. The paint is quite tricky to get to stick to these dinos, though, and the lids were a NIGHTMARE. It must just be the material on these particular ones, as the ones on the plastic set of jars used for the previously mentioned pink ones were super easy.
Here's a closeup of the pterodactyl and some of the other 2.
The next project I worked on was again, very simple in theory, but I think turned out fantastic.
Literally, the only materials used were a blank canvas, scrapbook paper, a punch, and mod podge.
I needed some new wall art, as I just redid my bathroom in elephants, and all my framed Hello Kitty prints looked a bit odd. This turned out perfectly, and matched great. Although it is a bit too small for the area I chose to hang it up in, so I'm going to end up posting this on Etsy and re-doing the project. I'm planning on doing the identical concept, and probably very similar paper, but on a 16x20 canvas with heart shapes, to match the shower curtain a little better.
The original idea came from this blog, I was drawn to it from the butterflies punched out of paint chips, then saw the "3d" butterflies on canvas out of scrapbook paper, and combined the two.
The most current project I'm working on is doing crayon art, as seen here. My first attempt did not go so great, I thought the black background would make it stand out, turns out it just made it look like nothing. The furthest I've gotten in my next attempt is just gluing down the heart-shape and breaking the crayons, as seen in the first photo.
Here's a photo of what I'm hoping my project will come out
looking anything like:
And, last but not least, after seeing dozens of beautiful homemade apothecary jars, I decided to try my hand at it. So far I've just made a cosmetic brush holder, but I think it turned out great. This project cost a whole $3. Got the base - a candle stick holder, the jar - a candle holder, and the stones all from Dollar Tree, and then glued the jar onto the base. I apologize for the messy bathroom, but here's how that turned out.
Anyway, like I said, many more to come. I hope to add actual jars, do a better job at the crayon art, and I'll post pics of the updated canvas pop art, and some photos of the process. Any questions, feel free to ask!
-T
Subscribe to:
Posts (Atom)