Showing posts with label nails. Show all posts

Tuesday, May 1, 2012

Some recent experiments

Haven't made a post in awhile here because I haven't really had a whole lot I was particularly fond of, except maybe the rainbow design. But figured I'd post a collection of stuff I've been doing lately.

I've been trying to use more of my newer polishes to test em out. Did a full swatch of Grape Pop by CG and absolutely loved it. 

 This is a perfect purple polish. Not too dark, goes on smooth. This is two coats with SV top coat.


I tried to add pink polka dots to a few nails, but really didn't like how it was turning out, so I cleaned off my ring fingers and added Turned Up Turquoise.

The color goes pretty well with the purple, but after 3 thick coats, I was regretting not layering it over white first. It's very sheer, and dries matte which I did not realize at first. It's a pretty color, and has a bit of a shimmer to it, but I wasn't a huge fan of the turn out.
 So, I wiped my ring fingers clean again, and coated them in Dance Baby, taped off the main part, and added Grape Pop to the corner.

Originally, I was going to add polka dots of Dance Baby onto the purple, but I thought it looked pretty good as is. I did my toes opposite this, Dance Baby for the main color, and angled corner of Grape Pop on the big toe.


I also swatched Color Club's Hot Like Lava. I was originally going to tape off small sections and do black over it, leaving the pink looking like ribbons. But I just couldn't get over how horribly streaky this all turned out. The color is very pretty, but the foil comes through on it's own way too much, and the streaks bugged me too badly to keep on. Will be used only as a layering color from here on out.

 Now this one, I was proud of. I didn't realize it until the day after, but I saw a very similar mani on Pinterest, but with a medium blue instead of the grey, so I guess that was my inspiration. I've been wanting to use Concrete Catwalk, but it didn't seem like a fun happy spring color.

This made it pop, I think. I call it "muted rainbow." Rainbow colors are all CG: Gothic Lolita, Flyin' High, Paper Chasing, Sunshine Pop, and Life Preserver.


Now this one could have turned out a lot better, but I still thought it was cute. I tried to do a jigsaw puzzle mani, but I chose some poor colors to do together. If I had substituted the purple with a yellow it would have come together a lot better, I think

Colors are CG: Life Preserver, Starboard, Flyin' High, and Secret Periwinkle.

 And lastly, just for fun, I tried my hand at doing nail art on someone else. I did my nieces nails in strawberries using dotting tools.

It turned out really cute, I think, though next time I try this I'm going to use a tiny paintbrush to do the leaves instead of a dotting tool for the whole thing.

Colors used were CG: Red Pearl, Paper Chasing, and White on White for the seeds.

Any questions on techniques or colors feel free to comment! Enjoy!
-T

Thursday, April 19, 2012

first pink wednesday, and a haul

So, even though it's the last thing I should have done at this point in time, I went slightly crazy over the countless online deals on nail polish. After trying to decide between the main retailers(8ty8beauty, transdesign, etc), I settled on Victoria's Nail Supply, for reasons I don't even remember right now. However I will say they were quick, cheap, and I'm happy.

Onto the photos!

The first is of all of them together. And then I grouped em into smaller photos to properly label them(and to even remember what I got today.) For the record, moving from photos and polish left to right, they are as follows: Color Club Hot Like Lava, CG Adore, CG Flyin' High, CG Paper Chasing, CG Dance Baby, CG Concrete Catwalk, CG Something Sweet, CG Kinetic Candy, Color Club Beyond the Mistletoe, Color Club Sugarplum Fairy, CG Grape Pop, CG Devotion, CG Refresh-mint, CG Calypso Blue, and CG Turned Up Turquoise.

I couldn't quite decide what to do first, so decided to pick at random something I've pinned recently, and came up with a triple pink striped mani. Original inspiration found here

Here's my stage by stage process, of course with a coat of SV in between, and then taped off for the new layers. Please forgive my spray paint and adhesive covered hands ps. The light pink is CG Something Sweet, the barbie pink is CG Dance Baby, and the hot pink is CC Hot Like Lava.


After finishing, I went to the original post to compare shades used, and saw the "We wear pink on Wednesdays tag." I was so excited that this was the first mani I could use that for, and ironically saw that it was her first one too!

Small world.

LOTS of new designs to come in the near future, methinks.

-T

Sunday, April 15, 2012

No more red, white, and blue...

...nails for awhile, because hockey season is over! My team's colors are blue/red and a little white, in case you were wondering why I have so many 4th of july designs...

With that being said, that brings me to the first design I have to show you.

Started off with pure white nails, China Glaze White on White style.

I like this white because it's not too chalky. Some whites do just look pure white-out on me.

Unfortunately I forgot to take a pic of the red-only, but essentially all I did was tape off all but the top angled half of the nail, and then painted it red with China Glaze's Red Pearl. I REALLY am not a fan of red ANYTHING, but it's not a bad polish. Has a bit of a shine to it.

After letting that and of course a coat of SV dry, I taped off all but the opposite corner, and then painted over with China Glaze(of course)'s Frostbite. Now Frostbite is a unique blue. Not TOO dark, and a very nice frosty shimmer.

I don't know why, but the blue was an absolute pain in the ass to do. The mani itself couldn't have taken me more than 2 minutes per nail, and that's including base, white, rip tape, place tape, paint, sv, repeat. But the blue just would not cooperate. Even at the end you could still see the red lines through, but as I was going to be in a dark hockey arena all night I called it good.

Here's a couple more shots of how it turned out.


I also thought I'd mention the routine products I use. I don't swear by it, but the base coat I've been using consistently is China Glaze's Strong Adhesion Base Coat. I don't get much staining, but occasionally there is a little. Sally Hansen makes a couple good base coats as well. I don't recommend Seche Vite's, though, unfortunately. As for top coat, I almost always use SV, if I'm doing any top coat.

Moving on... the design I did to inspire the above one, I'm not particularly fond of, because I kind of grabbed the wrong color in the dark...oops. I used the identical method as listed above, but I only did one corner. It was meant to be black with blue glitter, and I didn't realize until taking photos that I grabbed a teal glitter.


Anywho. Black is CG Liquid Leather. Teal is Finger Paint's Art you Wondering. I took a closeup of the bottle to show how pretty the glitter is. The blue I was going to use is EVEN PRETTIER, but I'll save that for another day!


The last mani I have to show you today is another half moon one. I definitely did steal the color combo off of Pinterest, so here is the link to the original post. I wish I had used the OPI color :/.


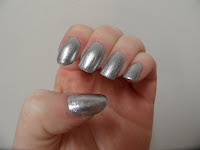
I started off with a base coat of LA Colors silver glitter...I know it HAD a name, but it's nowhere on the bottle. I've honestly bought about 5 more silver glitters/foils trying to find a PURE foil, but this is by far the best I can find, and it cost a whopping $1 at Dollar Tree. I did mess up one nail a bit :(.


I then used the same method mentioned a few blogs back, but took a pic this time! And did an overcoat of CG For Audrey.


I really wish I could say I like how the colors went together, but I'm not a huge fan. However, it is very spring appropriate, so it's stayed for now. Here's the final result, as well as a couple more pics of the silver to show how well it turned out on it's own. And a super cheap ring I got from Claires, which kind of tied it all together nicely, I think.


-T

Tuesday, April 10, 2012

Disco ball nails

I was gonna wait to post another nail update after I had a couple more designs underhand, but, I've been looking for a good Deborah Lippmann's Happy Birthday replica, and thought others might be, too, so wanted to share asap!

This is Happy Birthday, by Deborah Lippmann. It retails for a whopping $18, which I just can't justify spending on one polish(in fact, with last month's Sallys sale, I got 6 China Glaze's at that price!) I've become sort of a China Glaze only snob lately, but saw a very cheap seemingly good replica at Claires a couple weeks ago and picked it up.


This is Bedazzled. It cost a whole $4.50, and got another cute Deborah Lippmann replica for half off with it.

I did a single coat of it when I got it, but didn't like it so kind of tossed it aside. Then when looking up pics of Happy Birthday, I saw it layered over black so decided to try it, and I absolutely love it! The boyfriend calls it disco ball nails, which I can't disagree with!

Did a couple coats of China Glaze's Liquid Leather, and sealed with a coat of Seche Vite first.
I've tried sooo many black polishes, and this one is amazing.

Then did a couple pretty thick coats of Bedazzled, until I was satisfied with the coverage. I haaate seeing open spots, and usually these thick glitters leave me annoyed, but this was super easy to cover up. Instead of doing a top coat of Seche Vite, I used Konad's top coat. It works well for the thick glitters in my opinion, since it's so thick and won't smudge a thing.

Final nails(shot in a couple different modes to accurately show the glitter):


Hope this helps anyone looking for a good replica. Enjoy!

-T

Monday, April 9, 2012

Two recent manis

With the first one-photo-only set of mani's out of the way, I figured I could post two I did recently that I actually got good photos of!


This is actually my current mani. I got China Glaze's Lighthouse a few weeks ago, and while I absolutely loved it right off the bat, it was so ungodly sheer that it could not be worn alone. I had the bright idea to wear it over another yellow, but my only other yellows were also too sheer. Even over white it seemed to show every little imperfection.

Then the other day I stumbled upon some remaining polishes from the Electropop collection at one of the Sallys in town and grabbed Sunshine Pop. That worn alone is just amazing. Two coats for full coverage. And one very thin coat of Lighthouse later, I'm in absolute love! The photos do capture some of the shimmer, but there's so much of it going on it's as if the top coat is frosted.


The second is navy blue with gold half moons.


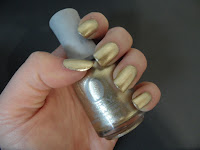
To achieve this look, first I painted all nails in gold, using Luxe by Orly, as seen above. Then using binder label stickers, I laid a circle on each nail, and painted over with my navy blue, which was Up All Night by China Glaze. The gold went on great, and looks good even on it's own. The blue is more of a DEEP blue, so unless in light it can end up looking black. The original tutorial I used was actually found on pinterest using the exact same colors. Here is that chart, for reference:


Hope you enjoyed. Many more to come!

-T

Old polish designs

Although I have nothing more to show you other than the finalized product, here is a short collection of some of the more recent nail designs I've done. If anyone has any questions on how I did what, or what color/brand I used, I can try to figure it out for you!

Here are the thumbnail versions, click for full image! I apologize about the crappy quality and/or surroundings, almost all of these were taken in terrible lighting in my kitchen, and all from my blackberry. moving forward I will at the least be using a nice camera to capture the true colors. The surroundings I can't do much about though, my kitties are very messy.


-T